Stitches & Techniques
How to Knit in the Round for Beginners
Learn how to knit in the round and create seamless tubes for hats, socks, and more. Covers circular needles, DPNs, magic loop, and joining without twisting.
Knitting in the round means working in a continuous spiral rather than back and forth in rows. The result is a seamless tube of fabric, perfect for hats, mittens, cowls, and socks. No seaming afterward. No purl rows if you want stockinette. Once you try it, you may never want to go back.
This guide walks you through everything you need to get started: the tools, the join, the marker, and the stitch pattern logic that makes circular knitting feel almost magical.
What Is Knitting in the Round?
Flat knitting moves you from one end of the needle to the other, flipping your work after each row. Circular knitting joins the two ends of your cast-on into a loop so you keep going in the same direction, round after round.
Because you never turn the work, the right side always faces you. That changes which stitches produce which textures:
- Knit every round → stockinette (smooth, V-shaped stitches)
- Alternate knit and purl rounds → garter stitch
- Alternate knit and purl stitches within each round → ribbing
This is one of the biggest surprises for beginners coming from flat knitting: to get stockinette in the round, you only ever knit. No purling required.
Tools for Circular Knitting
You have three main options. Each has a sweet spot depending on your project size.
Circular Needles vs. DPNs vs. Magic Loop
| Method | What it is | Best for | Beginner-friendly? |
|---|---|---|---|
| Short circular needles | Two needle tips joined by a fixed cable (16" or 9") | Hats, cowls, large tubes | Yes, for medium circumferences |
| Long circular needle (magic loop) | One long cable (40"+) looped around to work small tubes | Socks, mittens, sleeves | Moderate learning curve |
| DPNs (double-pointed needles) | Set of 4 or 5 short needles used together | Socks, gloves, tiny tubes | Fiddly but satisfying once it clicks |
For a first project, a 16-inch circular needle for a simple hat is the most approachable. The cable holds the stitches, the tips feel familiar, and there's no juggling four needles at once.
What Needle Length to Choose
The cable length needs to be shorter than the circumference of your project. A standard adult hat sits around 20 inches around, so a 16-inch circular works well. If you try to use a 16-inch needle for 60 stitches on a DK-weight yarn and the stitches feel strangled on the cable, the needle is too long for that stitch count.
Magic loop solves this: one 40-inch cable handles any circumference by pulling a loop of cable out at the midpoint. It looks awkward at first and becomes second nature quickly.
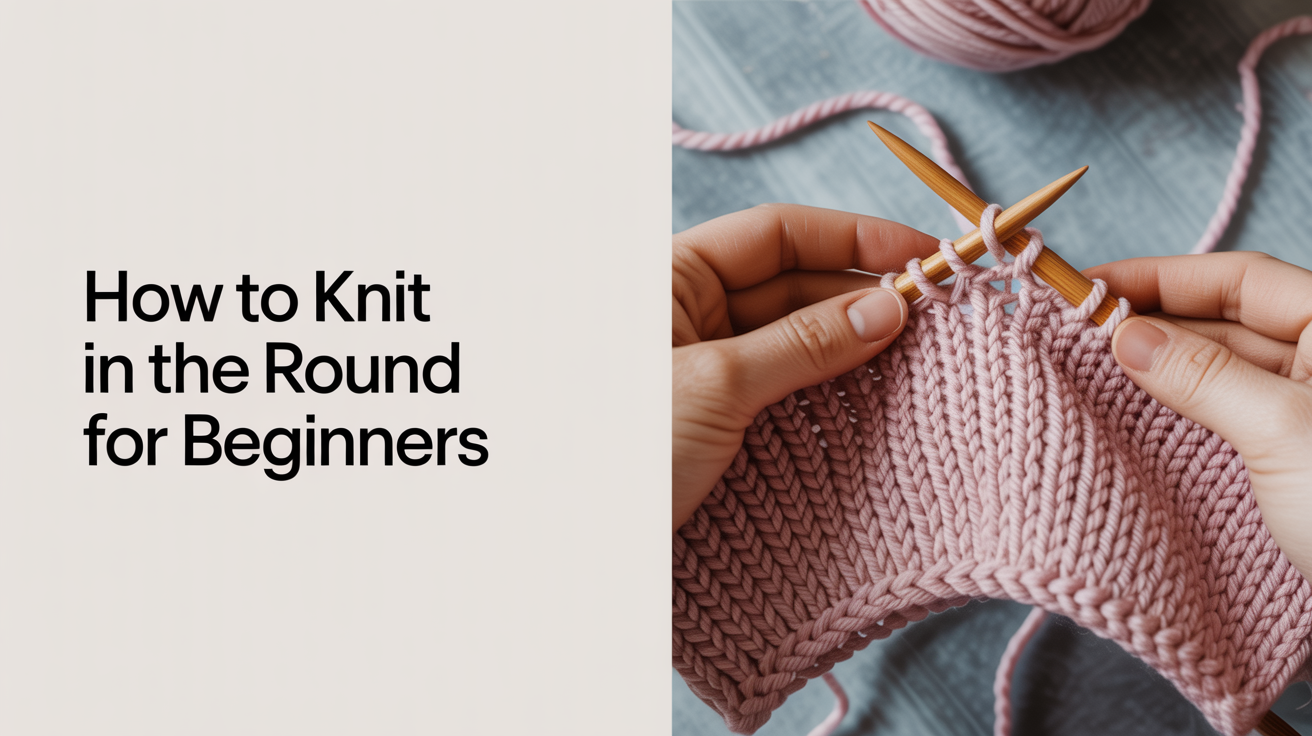
How to Cast On and Join Without Twisting
The join is the step beginners dread most, and the only rule that truly matters is: do not let your cast-on twist around the cable before you join.
A twisted cast-on is unfixable once you've knitted a few rounds. You'd have to rip back to the beginning. So here's how to avoid it.
Step-by-Step Join
- Cast on your stitches using your preferred method. Long-tail cast-on is great for circular knitting because it's stretchy and lies flat.
- Spread the stitches out so they all sit on top of the needle (not hanging below or twisted underneath). Every stitch bump should face the same direction, toward the inside of the loop.
- Check for twists. Lay the whole thing flat on a table. The cast-on edge should form an even arc with no spiraling. If any section has twisted, untwist it now.
- Place a stitch marker on the right-hand needle tip. This marks the start of your round. Every time you pass this marker, you've completed one round.
- Bring the needle tips together so the last cast-on stitch is on your right needle and the first cast-on stitch is on your left needle. Insert the right needle into the first stitch on the left needle and knit it. Pull that first stitch snug to close the gap.
You're joined. Knit every stitch until you reach the marker, slip it to the right needle, and keep going.
The Stitch Marker Is Not Optional
It sounds small, but without a marker you'll lose track of where rounds begin and end. This matters for shaping (decreasing for a hat crown, for example), stitch pattern repeats, and counting total rounds. Use a simple loop marker or even a tied piece of scrap yarn in a contrasting color.
Knitting Your First Rounds
Once you've joined, knitting in the round feels like flat knitting with one difference: you never turn. Just keep going.
For stockinette, knit every stitch. Pull the yarn snug when you pass the join point for the first round or two; that's usually where a small gap or loose stitch appears. A gentle tug closes it.
Reading Your Knitting
After a few rounds, your fabric will start to cup into a tube. Look at the stitches: you'll see clean V-shapes on the outside. That's stockinette appearing automatically because you're always working from the right side.
If you see ridges (garter stitch) instead, you're probably purling when you meant to knit, or you accidentally turned the work. Just check that the right side still faces you before each stitch.
Managing Tension at the Join
Many knitters notice a small "ladder" (a column of loose stitches) where one needle ends and the next begins, especially with DPNs. The fix: knit the first two or three stitches of the new needle slightly tighter, or shift the stitch positions slightly between rounds so the join point isn't always the same spot.
Common First Projects for Circular Knitting
A simple stockinette hat is the classic first circular project for good reason. You cast on, knit straight for several inches, then work a set of decrease rounds to close the crown. By the end you understand joins, markers, and basic shaping.
From there, a ribbed cuff worked in the round is satisfying and fast. Ribbing knit in the round uses the same join, but alternates knit and purl stitches within each round to create that stretchy texture cuffs need.
Once you're comfortable with a hat, mittens and simple socks open up. Both involve increases and decreases to shape the thumb gusset or the heel. Those techniques aren't hard, but they're much easier to practice first on a flat swatch before combining them with circular knitting.
(Crochet fans: circular construction exists there too. A granny square is worked in rounds from the center out, and the same "right side always facing you" logic applies.)
Frequently Asked Questions
What's the easiest way to knit in the round as a beginner?
Start with a 16-inch circular needle and a simple hat pattern. The fixed cable length keeps your stitches organized, and a hat is forgiving of minor tension variations. Aim for a pattern with at least 80 stitches on worsted-weight yarn so the stitches aren't cramped on the cable.
How do I avoid twisting when I join?
Before joining, lay the cast-on flat and visually check that every stitch faces the same direction. The bump of the cast-on edge should run along the bottom, not spiral. Don't rush this step. A twist isn't visible until a few rounds in, at which point you'd have to start over.
Why does my knitting look like garter stitch instead of stockinette?
You may have turned your work at the end of a round out of habit. In circular knitting, you never flip it. Always keep the right side facing you and knit every stitch to get stockinette. If you're seeing ridges, check whether you accidentally started purling.
Can I use regular straight needles instead of circular or DPNs?
No. Straight needles can't form the loop needed to join the cast-on. Circular needles or DPNs are required for knitting a tube. That said, if you only have straight needles, you can knit the same piece flat and seam it afterward. The end result looks similar for most projects.
What's the difference between magic loop and using DPNs?
Both methods work small circumferences. DPNs divide stitches across multiple short needles and feel more traditional; many knitters find them fiddly at first but fast once the muscle memory develops. Magic loop uses a single long cable looped around at the halfway point, so you only manage two needle tips. Neither is objectively better. Try both on a small swatch and see which feels comfortable.