Stitches & Techniques
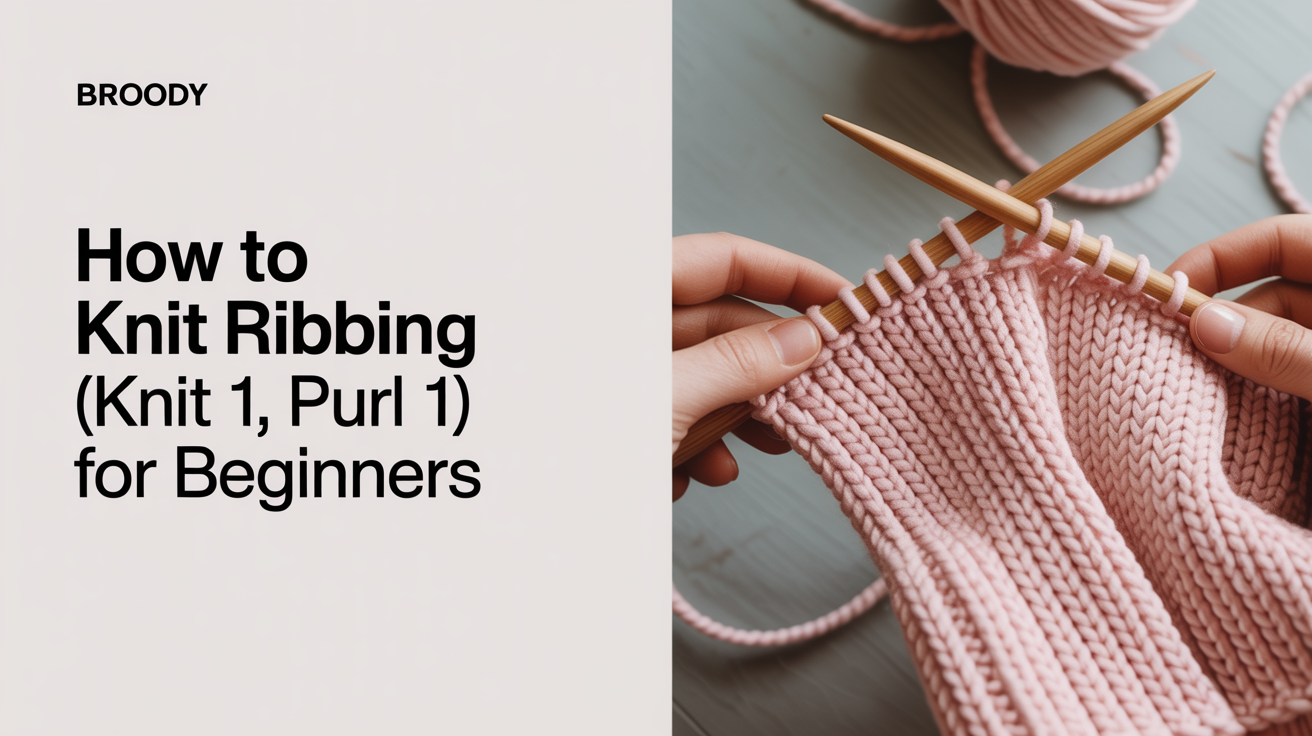
How to Knit Ribbing (Knit 1, Purl 1) for Beginners
Learn to knit k1 p1 ribbing step by step: yarn placement, 2x2 rib, reading your work, and fixing the most common beginner mistakes.
Ribbing is one of those skills that transforms your knitting almost immediately. You finish a hat and suddenly the brim hugs your head instead of flopping. You complete a sleeve and the cuff actually stays put. That snug, stretchy quality comes from a simple alternating pattern of knit and purl stitches, and once you understand what's happening, it clicks fast.
This guide focuses on knit 1, purl 1 ribbing (written as k1p1 or 1x1 rib), the most basic version. You'll also find a section on 2x2 rib so you have both tools in your kit.
What Ribbing Is and Why It Stretches
Ribbing is a fabric created by alternating knit stitches and purl stitches in the same row. On the surface, this looks like vertical columns of Vs (knit) and bumps (purl). But here's the clever part: those columns pull toward each other elastically. The knit columns sit forward, the purl columns recede, and the result is a fabric that compresses and springs back.
That elastic quality makes ribbing the default choice for:
- Cuffs and sleeve ends (they grip your wrist)
- Hat brims (no floppy edge)
- Sock cuffs
- Neckbands and collars
- The bottom hem of a sweater
A plain stockinette fabric (all knit on the right side) has almost no horizontal stretch. Ribbing can stretch to nearly double its resting width and snap back without losing shape. That's why designers reach for it anywhere the knitting needs to hug the body.
The Difference Between 1x1 and 2x2 Rib
The numbers tell you how many stitches in each column. 1x1 rib (k1p1) alternates every single stitch: knit one, purl one, knit one, purl one. 2x2 rib (k2p2) groups them in pairs: knit two, purl two, knit two, purl two. Both stretch well. 1x1 rib is slightly denser and very tidy; 2x2 rib shows more pronounced columns and is common on heavier garments.
For your first try, 1x1 rib is perfect.
What You Need Before You Start
You don't need anything special. Any yarn and matching needles will work, though a smooth, light-colored yarn makes it easier to see your stitches clearly.
- Yarn: Worsted weight (around 200m/100g) is a good learner weight
- Needles: The size recommended on your yarn label (usually US 7–9 / 4.5–5.5mm for worsted)
- Stitch count: Cast on an even number of stitches for 1x1 rib. Start with 20 stitches to practice.
A basic long-tail or cable cast-on works fine. If you're using the cast-on to start a hat brim or cuff, cast on your full stitch count as instructed in your pattern.
How to Knit 1x1 Ribbing: Step by Step
The entire secret to clean ribbing is yarn position. Before a knit stitch, the yarn sits at the back of your work. Before a purl stitch, the yarn moves to the front. Forgetting to move the yarn is the single most common beginner mistake, and it creates an accidental yarn-over that adds an extra stitch. So pay attention to where your yarn is before each stitch, not just what stitch to make.
Here's the row, broken down stitch by stitch:
-
Set up: Hold your needle with cast-on stitches in your left hand. Your yarn should be coming from the back of the work (the position it's in after a cast-on).
-
Knit one (k1): Yarn is at the back. Insert your right needle into the first stitch from left to right (front to back), wrap yarn counterclockwise around the right needle, pull the loop through, and slip the old stitch off the left needle. You've just knitted one stitch.
-
Move yarn to the front: Bring the yarn between the two needle tips toward you, so it hangs in front of the work. This is called "yarn forward" or "wyif." Don't wrap it over the needle, just slip it between the tips.
-
Purl one (p1): Yarn is at the front. Insert your right needle into the next stitch from right to left (back to front), wrap yarn counterclockwise around the right needle, pull the loop through, and slip the old stitch off. You've just purled one stitch.
-
Move yarn to the back: Bring the yarn between the two needle tips away from you, so it hangs behind the work. This is "yarn back" or "wyib."
-
Repeat steps 2–5 across the row: knit one, yarn front, purl one, yarn back, knit one, yarn front, purl one, yarn back... until you reach the end of the row.
-
Turn your work and repeat the same sequence on the next row.
That's it. The same row, repeated. Unlike some stitch patterns that have different right-side and wrong-side rows, 1x1 ribbing is identical on both sides. Every row is k1, p1 across.
A Note on the First Few Rows
The first two or three rows of ribbing can look a bit lumpy and unclear. Don't panic. Ribbing only looks like ribbing once the columns have a few rows to develop. Give it four to six rows before judging whether it's working.
Reading Your Ribbing: How to Know What Stitch Comes Next
After a few rows, you can stop counting and start reading your knitting. This is a skill worth building early.
Look at the stitch sitting on your left needle, ready to be worked:
- If you see a V shape (a smooth loop leaning toward you), it's a knit stitch. Knit it.
- If you see a bump (a horizontal bar sitting in front of the stitch), it's a purl stitch. Purl it.
Work the stitch the way it presents itself. Knit the knits, purl the purls. Once you can do this, you never need to count k1p1 across a row again, your knitting tells you what to do.
This skill also helps you catch mistakes. If you see two bumps in a row where there should be a V, you probably forgot to move the yarn before purling and created an accidental yarn-over. Better to spot it early.
How to Knit 2x2 Ribbing
Once 1x1 rib feels comfortable, 2x2 is a small step further. Cast on a multiple of 4 stitches (20 or 24 works well to practice).
- Knit two (k2): Work two knit stitches in a row, yarn at back for both.
- Move yarn to the front.
- Purl two (p2): Work two purl stitches, yarn at front for both.
- Move yarn to the back.
- Repeat k2, p2 across the row.
Turn and work the same sequence. Knit the knits, purl the purls.
2x2 rib has a slightly more open, springy feel than 1x1 rib. It's common in sweater bodies, boot socks, and anywhere you want a pronounced ribbed texture. The yarn-position rule is identical, move the yarn between tips before every knit-to-purl or purl-to-knit transition.
If you're ready to put ribbing to use on a project worked in a circle, see how to knit in the round for beginners. Ribbing in the round is slightly simpler because you're always working the right side.
Common Mistakes and How to Fix Them
You have extra stitches
You started with 20 stitches and now you have 22. Almost certainly, you forgot to move the yarn before a stitch. When you insert the needle to purl with the yarn still at the back, then bring it forward over the needle to begin the purl, you've created an accidental yarn-over, an extra loop counted as a stitch.
Fix: Count your stitches at the end of each row for the first few rows. When you find an extra loop that looks like a loose strand, identify which transition you missed. If you're at the beginning of a project, it's easiest to unravel back to the cast-on and start fresh with careful attention to yarn placement.
Your ribbing doesn't look like columns
If the V columns and bump columns aren't aligning vertically, check whether you're working the correct stitch on each row. Remember: knit the knits, purl the purls. If you knit every stitch on the return row, you'll get seed stitch (alternating bumps in a checkerboard), not ribbing.
The edges look loose or loopy
This is normal with ribbing, especially at the edges of a flat piece. You can tighten the first stitch of each row slightly by tugging the yarn after you work it. Some knitters also slip the first stitch purlwise to neaten the edge, though this isn't necessary for functionality.
Your fabric doesn't stretch
If your ribbing pulls in but doesn't stretch back, you may be knitting too tightly. Try going up half a needle size. Ribbing needs a little ease in the stitches to open and close freely.
For a broader look at shaping techniques that pair well with ribbing, check out our guide on increases and decreases in knitting explained. And if you're curious about crochet's equivalent stretchy stitch, our crochet granny square guide is a good next step once you're ready to pick up a hook.
Frequently Asked Questions
Why does ribbing pull in so much compared to stockinette?
Ribbing compresses horizontally because the knit and purl columns pull in opposite directions. The knit columns want to sit forward; the purl columns recede. This tug-of-war draws the fabric inward. It's not a mistake, that compression is exactly what creates the stretch. When you pull the ribbing apart, you're releasing the tension stored in those columns, and when you let go, the fabric snaps back.
Do I use the same needle size for ribbing as for the main body of my project?
Often, patterns call for a needle one or two sizes smaller for ribbing sections. This makes the ribbing denser and increases the snap-back. Always follow your pattern's needle size recommendation. If you're experimenting on your own, try the same size first and go down if the ribbing feels too loose.
Can I knit ribbing in the round?
Yes, and it's actually easier in the round because every round is a right-side round. Work k1p1 (or k2p2) continuously around, moving the yarn as described above. The stitch sequence repeats every round with no return row to think about.
How do I bind off ribbing without it being too tight?
A standard bind-off can pull in and constrict the edge of ribbing. Use a stretchy bind-off instead: the most common is the sewn bind-off (thread yarn on a tapestry needle and work through stitches), or a simple "knit 2 together through back loop" bind-off. You can also use a needle one or two sizes larger for the bind-off row.
My knit stitches look twisted. What's happening?
Twisted knit stitches (a tighter, crossed V) usually mean you're inserting the needle into the back leg of the stitch rather than the front. For a standard knit stitch, insert the right needle from left to right through the front of the stitch. If your cast-on produced twisted loops, you may need to knit through the back loop on the first row only to untwist them, then work normally after that.