Knitting Basics
Knit vs. Purl: How to Tell Your Stitches Apart
Learn to tell a knit stitch from a purl stitch by shape and texture. A plain-English beginner guide to reading your knitting confidently.
Every knitting pattern is built from two stitches: the knit and the purl. They are mirror images of each other, and once you can tell them apart just by looking, a lot of things click into place. You can check your work, recover from mistakes, and pick up a half-finished project without losing your place.
The good news is that identifying knit and purl stitches comes down to one simple visual clue. This guide walks you through what each stitch looks like, how to spot them on the needle, and how to read them in a finished piece of fabric.
What a Knit Stitch Looks Like
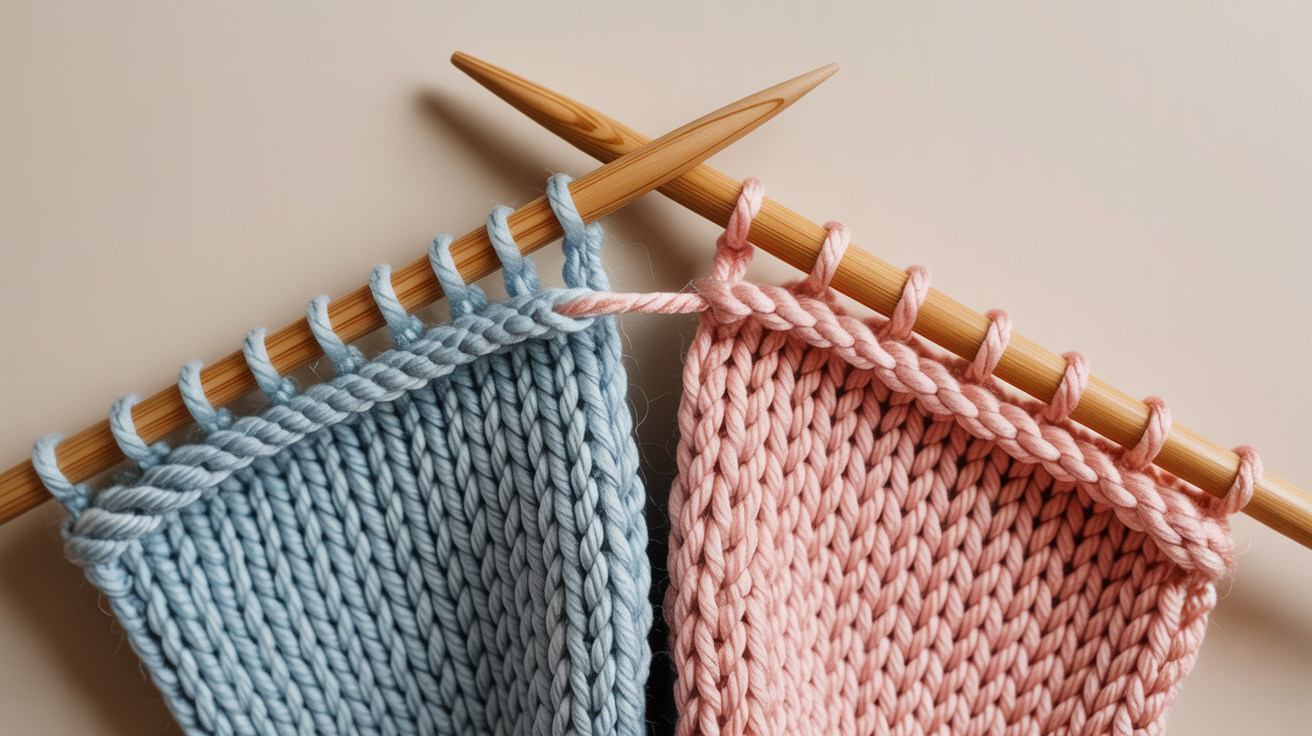
A knit stitch has a smooth, V-shaped face. When you work a row of knit stitches and look at the side facing you, you see a column of interlocking Vs running up and down. The yarn wraps behind the needle and pulls through to the front, which is why the face looks tidy and flat.
Think of the V as a little necklace pendant sitting on the fabric. That shape is your signal that you are looking at the knit side of that stitch.
On the back of a knit stitch you will see the purl bump. This is a horizontal ridge of yarn that sits across the fabric. So every knit stitch has a purl bump on its reverse side. The same is true in the other direction: every purl stitch you see from the front looks like a bump, but flip the fabric over and you find a V.
If you want to practice making the knit stitch before focusing on identifying it, the knit stitch explained step by step covers hand position and motion in full detail.
What a Purl Stitch Looks Like
A purl stitch has a bump on the face. The yarn comes forward in front of the needle before you insert it, which pushes a little horizontal loop of yarn toward you. That bump sits across the fabric like a small horizontal bar.
A whole row of purl stitches produces what knitters call the wrong side of stockinette (stockinette is the smooth fabric you get when you knit one row and purl the next on flat needles). It looks bumpy and textured, almost like a pebbly surface.
The bump is the quickest way to recognize a purl stitch. If you see a raised horizontal loop at the base of a stitch, you are looking at a purl.
For a full walkthrough of how to form the purl stitch, see the purl stitch explained for beginners.
How to Tell Them Apart on the Needle
This is where many beginners get confused, because stitches on the needle look a little different from stitches in finished fabric. Here is a reliable method for identifying what you have on the needle before you knit or purl it.
Look at what is sitting in front of the needle shaft. Hold your needle with the working yarn and stitches on it in your left hand. Look at the first stitch.
- If you see a smooth loop sitting cleanly on the needle with no bump in front of it, that is a knit stitch waiting to be worked.
- If you see a horizontal bar of yarn sitting in front of the needle shaft, below the loop, that is a purl stitch.
Another way to think about it: the purl bump that belongs to a stitch is always visible in front of (toward you from) the needle. The knit V is sitting on top of the needle, tucked back.
A quick physical check. Gently pull the fabric down below the needle so the stitches stretch a little. The Vs and bumps become more obvious when the fabric is under mild tension. This small move makes reading stitches much easier when you are first learning.
Count as you go. If your pattern has you knit 3, purl 3, count the stitches as you work and match what you see on the needle to your count. The visual check and the count together are more reliable than either one alone.
Reading Stitches in Finished Fabric
Once a stitch has left the needle and settled into the fabric, identifying it is straightforward. This skill matters when you need to pick up dropped stitches, check your stitch count, or figure out where you left off in a pattern.
In stockinette fabric: The right side (the side you usually see on a sweater or hat) shows all Vs. The wrong side shows all bumps. If you are not sure which side is which, look at the edge where the yarn tail hangs: the side where you cast on from will tell you which row came first.
In garter stitch fabric: Garter stitch is every row knit. Both sides of garter fabric look the same: horizontal ridges of bumps alternating with rows of Vs. Each ridge you see represents two rows of knitting, because one row creates the Vs and the next row, also knitted, pushes those Vs behind to make the bump. Counting ridges is useful for tracking row count in garter projects.
In ribbing: Ribbing alternates knit and purl stitches in the same row, for example knit 2, purl 2. On the fabric you will see columns of Vs (the knit columns) and columns of bumps (the purl columns) running side by side. This is a good pattern to study because you can clearly see both stitch types next to each other in the same piece of fabric.
If you are not yet comfortable casting on, do that first before practicing stitch identification, since you need a few rows of fabric to practice on.
A Simple Practice Exercise
Make a small swatch to train your eye. Cast on 12 stitches.
- Row 1: Knit all 12 stitches.
- Row 2: Purl all 12 stitches.
- Repeat rows 1 and 2 four more times, then cast off.
After you finish, lay the swatch flat and look at it from both sides. Trace the columns of Vs with your finger on the smooth side. Then flip it and trace the bumps on the other side. Try to find the same stitch from both directions.
Next, hold the swatch up and look at it from the cast-on edge. You will see the horizontal ridges. Each ridge is one row. This exercise builds the visual memory you need to read your knitting without second-guessing yourself.
Frequently Asked Questions
Does it matter which side of the stitch is facing me when I work it? Yes. A stitch that has slipped around so the wrong leg is in front is called a twisted stitch. If you work it normally it will close up tighter than the others and look different in the fabric. To fix it, slip it back to the left needle and reorient it so the right leg sits in front before you work it.
My stitches look the same on both sides. Did I do something wrong? Not necessarily. Some stitch patterns look similar on both sides, particularly seed stitch (alternating knit and purl across every row with offsets). If your fabric curls at the edges and one side is smooth while the other is bumpy, that is standard stockinette and nothing is wrong.
How do I know which stitch to make next if I lost my place in a ribbing pattern? Look at the stitch on the left needle. If you see a V (knit), you knit it. If you see a bump (purl), you purl it. In ribbing, you always work each stitch the same way it appears on the needle: knit the knits and purl the purls.
Can I identify stitches in loosely spun or fuzzy yarn? Fuzzy or halo yarns (like mohair) make this harder because the fibers obscure the stitch structure. Use smooth, plied yarn for practice. Once you have trained your eye on clear yarn, fuzzy yarn becomes easier to read because you know what shapes you are looking for even through the fuzz.
What if a stitch falls off the needle before I can identify it? Pick it up by inserting the needle tip through the loop from front to back (for a knit stitch) or back to front (for a purl stitch), then check which direction the right leg is pointing before you work it. If you are unsure, look at the stitches directly above and below it in the column to see what that column should be.